Monday, June 15, 2020

Crusader I, II, and III

Having finished the two Grant/Lee tanks, I decided that I would tackle the four Crusader tanks because they seemed easier than the German tanks. How foolish of me. 

The chassis went together nicely. My plan of adding the Crusader I MG turret worked out nicely. I just thinned out the plastic a bit to help the turret stick. It probably did not need it because I've found the magnets powerful enough to attract through at least one layer of plastic.


It was after I cut out the turret parts that I realized that magnetizing the options was going to be a bit more difficult than I had thought. There's two turret tops but only one turret bottom. So, to swap between the Crusader III and the earlier models, I would have to magnetize the top and bottom. And of course, the two turret tops have completely different hatches, with earlier versions having a slide top. And the Crusader I/II has two different types of gun, a 2lber and a 3" howitzer. 


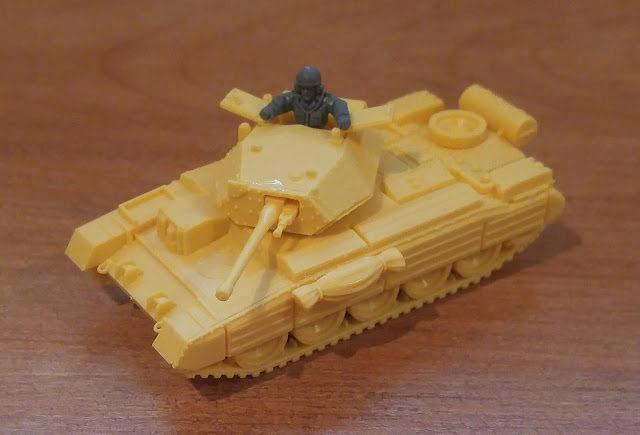
18 magnets later, I have a completely swappable tank able to be Crusader I complete with auxiliary turret, a Crusader II, a Crusader II CS, and a Crusader III. 


At least I have a pattern to use for the remaining three tanks. I'm going to pay greater attention to polarity in this one so that all the parts will be swappable across all of the Crusaders. This is an extra pain but it will be a benefit when it comes time for gaming. I reckon that fiddling with polarity has added about 30% extra time, but I'm getting a bit smarter in dealing with it.

Thursday, June 11, 2020

Next Project: Tanks a lot!

 
I have plenty of tanks. But most of them are 6mm. I do have a very small number of 28mm tanks (2xT34 from two different manufacturers and of different sizes, a Hetzer, and a Sdkfz 222). The 6mm are fine for What A Tanker played on a small board via web cam, but they really don't cut it for a proper game. 

But I do have some 15mm tanks. I have 4 metal T34s of unknown origin, an ancient Battlefront T34 with a resin body and turret and metal accessories, and two sets of FOW El Alamein kits that I won while attending Trumpeter events. One came as a full game, the other was just the tanks.

After the extended time it took to do the 2mm terrain, I figure that doing 15 tanks was a more manageable goal within a reasonable time, especially when the all metal tanks are already done.

But I'm not going to limit myself to just assembling the plastic ones. Why build just a Grant when you can change the turret and have a Lee? Why bother with Buttoned tokens when you can button or unbutton the model?

So armed with some glue, about 260 3mm x 1mm magnets, some knives, a dremel, a drill, tweezers, some other tools, and a whole bunch of patience and ambition, I'm planning on making convertible tanks.

I started off with a Grant. Initially, I was just planning on making it buttoned/unbuttoned, but then I realized that the kit allows me to build as a Lee as well. (The instructions don't show how to build a Lee but the parts are there.) Had I realized before I started that you also had a choice of M2 and M3 for the 75mm sponson gun, I might have attempted to make that swap-able as well. On second thoughts, that might be more trouble than it's worth though.  

Anyway, here is the first tank:

This Grant is buttoned up but I can swap in the open hatch with commander. Or I can go with the Lee turret with the button or unbuttoned MG turret. Because I only have 6 British figures for 6 British tanks, I needed to make the command figures swapable too, and so I can move the commander to the open Lee hatch. The magnet that holds the open MG turret to the main turret serves a double duty as it also holds the command figure through a very thin plastic layer (you can actually see a bit of the magnet.

Tuesday, June 9, 2020

Project 2mm Terrain: Lessons Learned

So now that I am done with my 2mm terrain, what are my thoughts?
  • At times it was a slog, other times it was enjoyable. The toughest moments were half way through the contours, probably somewhere around the 120 foot mark. I had been creating elevations but was mostly just almost covering the previous contour. I enjoyed putting on the flock the most because of how good it made the board look.
  • I'm stubborn. Even though I knew my contouring was flawed, I kept consistent with my method even though it was not efficient nor fast.
  • In retrospect, I should have done a contour every 20 feet because that would have represented the actual slope of the land better.
  • I might not do contours next time. Instead, I'll do smoothed hills. That being said, I think the contours worked pretty well for this board.
  • Stupidly, I didn't bother using Google Earth to look at the terrain until I nearly completed the contours. I guess I got excited by having a good contour map to look at and just didn't consider the vertical scaling.
  • There's a number of maps of Gaines Mill and other than all of them agreeing that Boatswain's Creek being wooded, they didn't agree much with the placement of other woods and swamps. In the end, I use the contour map for the Boatswain's Creek woods and another map for the other woods. I also extended the Boatswain's Creek woods and swamp based on the description of the battle. I figured the D.H. Hill probably had a good reason not to just immediately attack the far left of the Union line, so I gave him that reason with that terrain. 
  • Looking at the actual contours, the positioning of some of the Union units makes little sense, particularly the artillery, so I moved them a bit for my recreation shots. Accounts of D.H. Hill coming under long range artillery fire is only possible if the batteries on the Union left are on the ridge line and not in the valley where the map has them.
  • The 3mm x 1mm magnets I bought (300 for $15CDN) work just great for placing the buildings.
  • It will be quite a while before I do any more 2mm terrain. I do have some buildings, walls, and tree castings I can paint.
  • If I do another board like this, it will probably be for Antietam (or part of it because that is a pretty big battle).

On to the next project. Let me give you a hint:


Thursday, June 4, 2020

Project 2mm Terrain: Done!!!!!

It's done! Finally finished!
I had a momentary bit of panic when I could not find my 2mm figures. While it's distressing to search and search for something, there was some good that came out of it: I did a little reorganization of my hobby desk/storage, cleaned out one more bin of hobby stuff, found some more 2mm terrain bits, and  found another 15mm tank that I can use for What A Tanker!. 

So in celebration of finishing the project, I put my newly found figures onto the terrain board. The stands represent roughly the positions in the battle of Gaines Mill 1862 at 2:30pm. I didn't put troops in the woods, but I could have because the woods are removable (as are the buildings). As my figures are based according to Antietam and for a different corps, the regiment names don't correspond to the regiments in the battle.

Anyway, here for you enjoyment are some pix:

Gregg's Confederate brigade emerging from the woods to attack Warren's Union brigade

View from above showing Gregg disguised as Wilcox and Warren disguised as Brooke

A third view of the action

From the Confederate viewpoint

DH Hill's division arrives on the far left of the Confederates
View of DH Hill's arrival in Old Cold Harbor. He would continue in this direction until he arrived on the flank of Gregg

Buchanan observes Hill's arrival with a protective swamp to his front

In the centre, Branch is launching his attack to support Gregg to his left. On the right, is Field. On the other side of the creek, Lovell's Unionists await in the woods.

Porter commands from near the Adams farm. Gregg's attack is in the background to the right. Directly ahead is the rear rank of Lovell's brigade.

To Porter's left, Martindale makes his headquarters in Watt's house. Most of his troops are dug in half way up the bank of Boatswain's Creek. To the left of Martindale is Butterfield.

A shot showing Field's Confederate brigade in the centre advancing in the woods of Boatswain's Creek. To his left is the second rank of Branch's brigade and behind him, partially obscured by woods is Pender. Powhite Creek is in the foreground and to the right.

Pender's brigade following Field's.