Thursday, October 17, 2019

Project 2mm Terrrain: Update 7

Woooo Hooo!

✅ 80 ✅ 90 ✅ 100  ✅ 110  120  130  140  150  160  170  180  190

I've completed all the hills on the board! It took a lot longer than I expected but I did get faster as I went along.


Here's the board almost complete with just the corner to go. I finished it the next night. Despite each contour being only 1mm, there's some really substantial valleys in the board.

Things I learned

Well, I've learned a few things that, if I ever do this again, I would do differently:
  • Not do every contour line. I would just do every second contour using the foamcore and use polyfilla to smooth out the contour lines
  • Put reinforcing bars. About half way through, the board started to warp and it's now at about 1/2 inch on both ends. 
  • Cork is a neat material to use. I would use it more often for contouring because it is easy to cut using scissors, flexible, and resists compression. It is pretty expensive if you need to use a lot.

What's next

  1. Add some 1x1 bars to the back to straighten it out.
  2. Since I have decided to keep the contours showing, trim some of the paper overhangs so that all of the contours are clean.
  3. Seal the board so that it won't absorb water when I flock.
  4. Mark the locations of the waterways, roads, and buildings.
  5. Figure out how tall to make the trees.
  6. Figure out where to put the woods and how to do them. One woods is marked on the board. I've seen another map with woods in other locations.

Wednesday, September 25, 2019

Trumpeter September and Call to Arms

On September 13th, Trumpeter held their regular monthly club meet. I managed to get into a 2mm game of American Civil War. We were doing the opening day of 1st Bull Run using a set of rules call Bonny Blue Flag. I found the rules very interesting if slightly frustrating in that you could spend a lot of valuable command points and not accomplish much. But on the other hand, I did launch a very successful attack late in the game on the far right. I think I'd very much consider using them for my own 2mm figures. As an added bonus, I met Doug from https://dotsofpaint.blogspot.com/. He has a very nice blog and you should check it out.

On the 14th, Trumpeter held a brand new event for them. A whole day of gaming in the fall.

The morning saw me back at ACW with a set of rules called Stars and Bars. It's a set of rules written over 40 years ago and it shows: written orders as its command and control, features a complex damage table, and relies on details to try to achieve a "realism". Unfortunately, it took a long time to set up and get the game going, so we ran out of time before getting really stuck in.

The afternoon game was French and Indian Wars using Rebels and Patriots. Basically, it's the same rules engine as Lion Rampant. I enjoy the system but I'm thinking it's a bit too loose for my taste.

The final game was modified Force on Force for WW2. I enjoyed the game except for when we had a PIAT team sneak to the rear flank of a buttoned Panther only to lose the initiative roll and be vaporized by a lightning-reflexed tank crew. The Germans attacked from an unexpected direction and it looked grim for the Canadians. But then the Germans became fixed on firing LMGs from their halftracks. The Canadians moved troops to the threatened flank and then every slight German burst was met with a massive volume of fire in response. It was an interesting game and I didn't realize how the Canadians were winning until I saw how their reaction fire was taking its toll. They were also helped by a very effective rocket attack by a Typhoon.

No pictures because of my phone. I have an ancient camera somewhere so I think I will have to look for it so that I can take some pictures.

Saturday, September 7, 2019

Project 2mm Terrain: Update 6

✅ 80 ✅ 90 ✅ 100  ✅ 110  120  130  140  150  160  170  180  190

That's another 2 levels done. The next set of two are the trickiest in terms of complex shapes but after that, the hills smooth out and take up less overall terrain.


The more I think about it, the more I'm inclined to keep the contour lines. I won't be saving any time because I would need to clean up the paper overhangs, but I think it will perform better as a gaming table, even if it is not quite as "realistic". There's a kind of honesty to keeping the construction method exposed that I'm appreciating.

(I really need to get a new phone. These are terrible pictures)

Sunday, September 1, 2019

Project 2mm Terrain: Update 5

✅ 80 ✅ 90 ✅ 100  ✅ 110  120  130  140  150  160  170  180  190 

Woo Hoo! I have the wind at my back and things are progressing nicely. I've just completed up to the 120 foot contour. It's this contour and the next two that are the most complex, large, and fiddly. The pinning technique is working brilliantly and it's helping to speed things up.

I'm currently waiting for the glue on the second part of the 120 to dry so that I can trim off the excess. So I thought I would take some time while the glue dries to do this update. Sorry, no pix but they really wouldn't show anything.

I've been watching Luke's APS channel on Youtube and it is brilliant in how he shares his techniques. Yes, he pushes his products but that is redeemed by how he reveals how he actually makes his products and how he uses them and how he uses competing products. From his one-day builds, he's given me an idea on how to finish and protect this project. If I can find it cheap enough, I'm planning on using a deep picture frame, turn it upside down, and insert the terrain. If I can't, I'll have a go at making the equivalent.

Wednesday, August 28, 2019

Project 2mm Terrain: Update 4

Well, I have now completed the hills on the extreme left of the battlefield, where the initial Confederate thrust came from.

I'll confess that my slow progress has mainly come from a lack of motivation, slow progress, and how fiddly the whole process has been. But last night, I had a brain wave. Since I am using foamcore and cork as my materials, I can just pin the terrain in place until it is dry. All of a sudden, the fiddliness has gone away and it's just become a matter of cutting the pieces out, gluing them, and pinning them in place.

Completing the western hills represents only a small fraction of the entire battlefield but doing something and having it come out looking really good has raise my morale and now I want get the rest done.

I was toying with the idea of smoothing out the contours but now I've gone the other way and I'm thinking I might keep them. I might do some experimentation before I decide.

Tuesday, August 27, 2019

Life and Death

Sometimes life sucks. Not long after I had posted my last project update, I received some bad news. My mother was in hospital and not doing well. I booked a flight for first thing the next morning. When I got into Calgary to change planes, I learned that she had passed.

The crazy thing is that I had talked to her a few days before. She had sounded a little breathless but otherwise seemed fine. She'd been having problems with swelling and severe itching. She was going back to the hospital the next day for a follow-up. She had had a full battery of testing and, while there were a lot of things that weren't quite right, she'd had them for a long time. We didn't have any indication that there was any immediate concern.

Two days later, she was gone.

Looking back, I'm glad that I saw her when we returned out East this last May. It had crossed my mind that it might be the last time I saw her. The previous May, she'd come to visit us in our new house. I found it concerning about how much difficulty she had in walking and, in particular, how she struggled to climb stairs. But she also displayed an iron will about getting to where she needed to go even though she would take some time to get there. Her only concession was to using a cane when she left the house.

My Mum's great joy was her garden. She came by her green thumb honestly. Her parents had created a prize winning garden in New Brighton, England, despite its modest size. In every house that she lived in, my Mum spent time creating and maintaining its garden. It's fitting that her final garden is her best. It's also fitting that she waged the same war against squirrels that her father did.

So what's next? We're planning a tree planting in Toronto on her birthday. Back here in BC, we're also going to plant a tree for her.

Wednesday, July 17, 2019

Project 2mm Terrain: Update 3

✅ 80 ✅ 90 ✅ 100  110  120  130  140  150  160  170  180  190 

I have now done the 90 foot contour and the 100 foot contour. The one change to my plans is that I've ended up gluing the paper pattern I used to cut the contours back onto the elevations. I think it will help me with positioning the roads, buildings and creeks later on.


I'm liking how it is looking but it is much, much slower going than I had anticipated. And it will get a lot worse too because the two levels that I did are likely the easiest ones to do. The next 2 levels will be the worst.

There are two "islands" on the left side and I've got one in the above shot. I'm going to the much larger one next and build it up to its apex of 170 feet because it will be useful practice for the rest of the board. I've already learned that I need to cut inside the lines and I shall learn a few more things as I go.

Sunday, July 7, 2019

Project 2mm Terrain: Update 2

So, I've spent the last few days tracing out the topographic lines with a different colour for each elevation.


Though tedious, it has been a useful exercise because sometimes the lines get hard to see, obscured by something on the map, or even almost overlapping. Tracing has let me work out what lines apply to each elevation.

It's also let me figure out the general lay of the land. Most of the battle field is at 150-170 feet.

I've also had yet another rethink and I've decided that I'm going to go with a 1mm cork with 2mm foamcore. I just couldn't find any 1mm board that would be sturdy enough so this will be a compromise of the heavy durability of cork and the cheapness of foamcore. It's going to be every second elevation line with the foamcore and the cork providing the step up between.

The next step is cut out the 100 foot mark, use it as a pattern on the foam core. Then I'll do the same for the 90 mark on the cork.

(I also apologize for the really crappy photography. The lens on my phone is so scratched up that all photos no look like they've been taken in a heavy fog.)

Wednesday, July 3, 2019

Project 2mm Terrain: Update 1

I now have the big map done and cut to fit my board. I ended up extending the length of the board by 3" just in case I want to recreate the battle exactly. The extra 3" lets me put 3 Confederate batteries on board, which is always better than off board.

I also skewed the map slightly to minimize the 80' contour and confine it to the very corner of the board.

I think the next step is to colourize the contour lines because my plan is to cut each contour out one at a time and use it as a pattern to cut my foamcore. This would be an effectively irreversible process (because I would need to reprint the map, tape it together, and re-cut the contour lines), so I don't want to make a mistake. I'm hoping the colouring will reduce the chance of an error.

I expect I won't be ready to cut my first contour until the weekend.

Tuesday, July 2, 2019

Project 2mm Terrain: A Slight Rethink

Of course, the moment I clicked Publish on my grand plans, all kind of thoughts came rushing forward. Most of them I dismissed right a way, but there was one that seemed kind of important.

The key thing about this project is that even though I may never game on the board, it is possible that I might. This means that it needs to work as a gaming board. Near the position of Anderson's battery, there's a rather steep hill down to the Powhite creek. It occurred to me that on the terrain board that the 5 levels of change might be a little steep for even 2mm figures on bases to handle. Basically, I was looking at the rise and run being about the same. I really don't want the miniatures to be tumbling down hills unless the hill is basically impassible.

(As an aside, I did a bit of a rough calculation and as far as I can tell, it's a 50 foot altitude change in 250 feet, so at a 20% grade, it is a significant descent.)

So I decided to blow the map up a bit more to mellow out the ascents and descents. So instead of going up 5 levels in about a 1/2", it will be closer to 1". As an added bonus, I think I can get rid of the 80' altitude band (the red line) to simplify my work (or I might just carve it into the MDF through a bit of Dremel work).


The cost is now I must position the big map onto the MDF to figure out which parts of the battlefield will disappear. I suspect the main subtractions will be on the right and on the bottom.

So it's a tiny step backwards but I think it will be better.

Monday, July 1, 2019

The Next Project: Project 2mm Terrain

With renovations slowing down for the summer, it's time to get back to building or painting some miniatures. So, in line with my New Year's Resolutions, it's time to announce my latest project:

Terrain for 2mm ACW

I don't really see anybody wanting to game with my 2mm figures but I do want to have some terrain so that they can have a nice display at the very least. I might even get some solo gaming in if I have something to play on. So, this has lead to this project.

Where to start

I've always liked those architectural models they used to do to display new buildings. They'd have a nice topographical levels to show the slopes and changes of elevation. I want to do that.

I've done a poke around the interwebs and stumbled upon a really good site for these maps: https://www.battlefields.org.

I wanted an eastern battle and I wanted one with some water features and some woods but also not too much. I also wanted one that looked reasonably big but not too big and with some elevation changes but not too much. 

In the end, I selected Gaines Mill, June 27th 1862. There's five creeks but only two are really important. There's some significant woods but they consume more than 15% of the board. There's between 70-190 feet of elevation but I'm going to ignore the very lowest level. Each contour line is 10 feet (I'm assuming feet because it is a US organization). As a bonus, I can easily extend the battlefield to the north and do Cold Harbor.

Here's the map:

The yellow is the 150 feet elevation, the green is 100, and red is 80 feet.

(Actually, there's three of them and they are slightly different in what they show, which will be handy in filling in the bits covered by the legend, title, and compass rose.)
 https://www.battlefields.org/sites/default/files/atoms/files/gaines-mill-june-27-1862-1-1.pdf.

If my calculations are correct, I'll be running a 1/6000 ground scale.

The plan

Here's the plan
  1. ✅Select the map.
  2. ✅Get the base board. I'm using a 2x4 piece of 2mm MDF but I'll only use 2x almost 3 of it for the board itself.
  3. ✅Get the material to build the elevations. I was originally going to use MDF for the elevations but there's a few problems with that. MDF is nasty stuff to work on dust wise and I want to minimize my lung's exposure to it. Secondly, while I actually have the perfect power tool to cut the back and forth wanderings, it's a power tool and I have limited time available to use it. Instead, I've gone with a nice set of foamcore boards. As a bonus, they're also a bit cheaper. With foamcore, I can just use some scalpels.
  4. ✅Scale up the maps to fit.
  5. Starting with the lowest elevation, start cutting out the hills. I have two copies of the map printed and ready to go (and I can make more copies if need be. I have 12 elevations to do but very few of them will be simple cuts.
    • ✅ 80 (only in the very lower left of the battle field)
    • ✅ 90
    • ✅ 100 (lower left and extending up the left side and from the left to the left centre)
    • ✅ 110
    • ✅ 120
    • 130
    • 140
    • 150 (the bulk of the battlefield is in this elevation or within 20 of it)
    • 160
    • 170
    • 180
    • 190 (just a few hilltops in the lower centre although there are some high spots in the upper centre as well
  6. Put in the streams and creeks.
  7. Put in the old roads. Fortunately, the PDF marks where they are.
  8. Put in the buildings. There are 4 of them.
  9. Review any existing images and see if I can figure out the fields and how they were delineated. Maybe also use Google Earth.
  10. I haven't decided whether I want to smooth out the contours using spackle. I think it depends on what I find in the previous step.
  11. Turf up the whole battlefield.
  12. Step back and admire.

Thursday, May 30, 2019

Trumpeter in May

For the May meeting, I decided to get involved with some micro micro armour. 3mm to be precise and they are very good Oddzial Osmy (Picoarmour) models in that I can figure out what type a tank each one is supposed to represent.

I played the German commander of a Kampfgruppe composed of teachers and students from a tank training school pitted against a brigade of British tanks. Basically, it was their 45 tanks vs my 13. On the positive side, 4 of mine were Tiger 1s and 2s along with 5 Panthers. However, half the British tanks were Fireflies with those nasty 17lbers.

I decided on a defense on depth with the Panthers blocking the left, which represented the most covered approach. I put my junkiest units up front on the right, and the heavy hitting Tigers at the back to keep the range as long as I could for as long as I could. I put one minefield on the extreme left to prevent slipping around the back of the Panthers while the other minefield would prevent the British from setting up a good fire line on some key hills.

Things started out moderately well with the Panthers taking out some Shermans way out on the far right making up for the blindness of the student tank hunters on the right. That caused the one company to fall back.

As a knock-on effect, the Sherman company on my left thought better of going up the centre out in the open and went around the hill to my far left. While they were doing that, my Panthers, Tigers, and others proceeded to pound the centre Sherman company.

However, it was not entirely one-sided. As I was reducing the centre and right Shermans, they did manage to wipe out my two units of tank hunters, which left me with nothing on the right. But while the remnants of the centre and right companies worked their way down the right (joined by the 4th company, which was created from earlier casualties), I turned my attention back to the leftmost Sherman company. A quick duel turned into a rout at the cost of a single Panther and the Sherman company retreated back around the hill, only to eventually reappear in the center after a couple of turns.

Eventually the weight of numbers began to tell as the Tigers brewed up under the attention of the Sherman companies on the right. Then the Panthers began to die until the German side had only one Tiger 2 and one Panther facing more than a dozen Shermans, at which we called the game. The Germans had killed more than 2 Shermans for each of their own casualties but it just wasn't enough against all of those Fireflies.

Chris has written a pretty interesting set of rules that have a lot of potential. They flow well and are pretty simple. I think the one refinement that needs to happen is to ditch the precision of the gun penetrations and adopt the simpler system he has for the armour.


Wednesday, May 1, 2019

Trumpeter Salute 2019

 (Apologies for the bad photos but the lens on my phone is badly scratched and smudged)

On April 13th, I went to Trumpeter Salute 2019, which is the biggest miniature war gaming convention in the Vancouver area. They had a good selection of games last year so I was really looking forward to this year's event.

A new feature they had this year was an online game registration where you could pre-register for one game. Very good idea and I hope they continue it next year.

Game 1

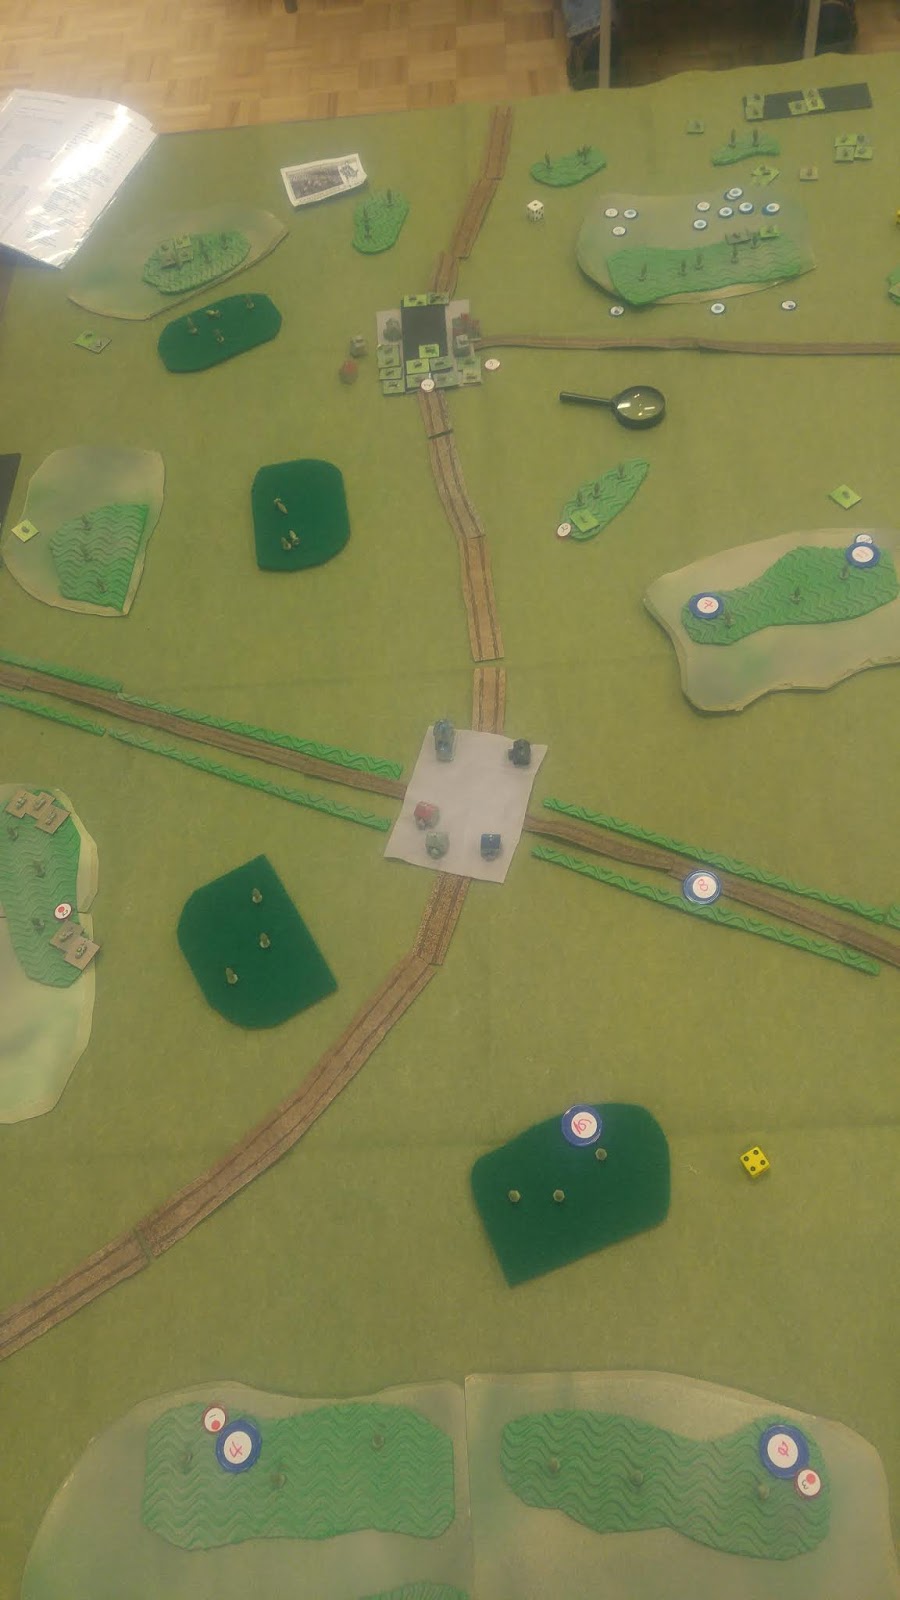
This was my pre-registration game. The rules were General D'Armee and the battle was Maxheim, which featured the French battling a combined Prussian-Russian force. One of the quirks of the allied side was that the Prussians had brigades on both flanks with the Russians in the centre.

In an omen on how things were to go, the French won the initiative and immediately occupied the village to my front. I decided I was not going to assault the village and instead opted for a delaying action, especially as we needed command dice to re-position a Prussian cavalry brigade to counter a French cavalry brigade. 

Being on the left flank, I'm a little fuzzy on the details on what happened on the right, but a disaster happened early over on the right where the Prussian cavalry and infantry routed. My contribution was to roll 0 aide d'camps out of 6 dice to try and rescue them. I think the Umpire just moved them back to the edge of the board rather than off. 

Meanwhile, on my side, I had lured the French beyond the garrison range and got ready to counterattack. First attempt met with a 12 rolled for casualties and my charge pretty much stopped before it could begin. Second attempt actually led to us rolling for the charge effect, but me rolling a 2 compared to a 10 or something saw another fail. 

I love the rules but this was a brutal game to play. All of the key die rolls by the Prussians and Russians were miserable failures.

Game 2

Mongolmania pitted Mongols against Rus in an all cavalry battle using Lion Rampant rules.  The Mongols started as a massive horde at one end of the table with three different groups of Rus trying to prevent them from exiting off the other side. Colin modified the rules slightly so that a failure to activate a unit didn't end your turn. Also, he had some special effects for rolling a 2 or a 12 when activating a unit.

I took a group of Rus. There wasn't much strategy in this and it was close. The turning point came quite late in the game. I had a unit of light horse that got the benefit of +1 to hit with archery and +1 to bravery because of a couple of 12s I had rolled. This unit was like a tactical nuke in that it took out 5 Mongolian units and it was untouched, while most of the remaining Mongolian units were pretty worn down (as were the Rus as well). However, a Mongolian player rolled a 12 and got a free shot on my super unit. Worse, he rolled really well and took out 3 figures. I then rolled a 2 for morale and that was it.

With not much Rus left, Colin declared the Mongols the victor in a close and bloody fight. Good fun!

Game 3

 In this game, the French were out to burn down a British fort using the Musket and Tomahawk rules. I was commanding the British provincial regulars in the fort and the provincial militia and Indians in the woods. Marching to my relief were two units of Scots regulars and two units of rangers. The French surprised me a bit by starting out on the far right instead of closer.

I decided to get aggressive with my Indians and advanced them into the woods that I expected the French to have been in. After a little hesitation, I advanced my militia down the centre. This turned out to be a minor mistake that lead to bad consequences. Meanwhile, the French slowly moved on the far right, staying largely out of sight in the woods.

My Indians reached the far edge of the woods and got into a musketry duel with 3 units of French irregulars. Despite being outnumbered, over the rest of the game, the British Indians decimated the French irregulars with remarkably accurate musketry. The British Indians suffered 2 total casualties while the French lost 30 of 36. However, the French did achieve their objective of keeping the British Indians away from the rest of the French forces (and even distracted British militia a bit).

Meanwhile, back at the fort, my regulars saw little until the French Indians and more irregulars arrived within 6" of the fort. (Seriously, who the heck builds a fort that close to dense woods?)

A remarkably poor morale roll saw my regular retreat from the walls early in the turn. That really was the game because the French Indians used remarkably effective flaming arrows to set the walls alight and also ran up to the wall and use torches.

Even getting a unit of regulars into the fort had little effect. The fire arrows were too effective and there were too many Indians and the fort started to burn.

Credit to the French for coming up with a good plan and being persistent in executing it, even if they left the French irregulars to get massacred by the British Indians.

(Photos to come)

Monday, April 1, 2019

What If: Japan vs Russia naval battle

This Friday, it was naval gaming at Craig's. The scenario was a 1914 encounter with the Russian navy protecting a convoy of troop carriers that were set to invade Korea.

The Russian navy had 4 modern ships and 4 pre-dreadnoughts facing off against a Japanese fleet with 2 semi-modern ships (or maybe they were also pre-dreadnoughts), 2 ultramodern Kongo class battlecruisers, and 6 pre-dreadnoughts. As I arrived just as things were getting started, I got 2 of the Japanese pre-dreadnoughts and I really didn't get a chance to see what the other ships were.

So the Japanese sort-of plan was to sail the pre-dreadnoughts straight at the heart of the Russian fleet to try to burst through and get at the convoy. The ships on the left were to swing over to the right and combine with the BCs to push that flank. The Russian plan was to delay the convoy for a couple of turns, combine all of their modern ships over the right as well (setting up for an epic clash), and swing their pre-dreadnoughts over to the left to protect that area and stay out of trouble.

The battle plans went awry right away. The Russian ships on the far right immediately ran into trouble with some lucky hits devastating them early. They remained floating for a number of turns but they were gone in turn 4 and turn 6 (I think). The other Russian modern ships attracted a lot of attention and suffered some loss in firepower and speed but were still in pretty good shape. The Japanese charge of the pre-dreadnoughts did have the benefit of attracting fire from these ships instead of at the heavier hitting Japanese modern fleet. It cost the Japanese a couple of pre-dreadnoughts by the end of the game.


Meanwhile, on the Japanese left, the plan to sail to the right was abandoned and they kept up a heavy fire the modern Russian ships now in the centre. As the Russian pre-dreadnoughts swung around in front of them, they began fire on them as well.

By the end of the game, the Russian fleet was in serious trouble. The modern elements of the Japanese navy were untouched and beginning to pound on the Russian modern ships. The Japanese pre-dreadnoughts in the centre were beginning to break through but were a bit worse for wear.


The battle really turned on the Japanese getting really good and lucky hits on the right and the charge of the pre-dreadnoughts attracting the Russian attention away from the modern ships in the Japanese fleet.

Thursday, February 28, 2019

General D'Armee at Trumpeter

So for the February edition of Trumpeter, I played in a game of General D'Armee. It was a refight of Quatre Bras with an Anglo-Dutch force trying to prevent the French from capturing the crossroads.

I took the Dutch brigade on the right consisting of 2 regular battalions, 2 green battalions, a battery, and 3 stands of skirmishers. My right was anchored on woods and to my left was a British brigade. Facing me was a brigade with another one pointed at the junction between me and the British brigade.

We got the initiative and immediately I sacrificed one of the green battalions to reinforce the skirmish screen. If I hadn't, I think I would have been overwhelmed quickly. The opening cannonades played havoc with the packed French deployment (lots of high die rolls) and the skirmishers also did quite well.

As the game progressed I gave ground slowly and the French artillery began to take its toll on my line troops. Additionally, my artillery eventually succumbed to skirmisher fire. Fortunately, they had taken quite a toll on the French before they quit the field.

(I had a picture to insert here but it has disappeared. I may have accidentally deleted it)

Meanwhile, on my left, the British brigade had been doing reasonably well holding up the French but they were being threatened by a small cavalry brigade to their left rear. At this point, our reserve brigade made a timely arrival after marching rapidly across from right to left. Using a forward tasking, they launched a long distance charge with the two attached cavalry regiments. We had a slight disadvantage going in but rolled sufficiently well to get into combat. At this point, the Dice Gods deserted us. Throwing 10D6 with a 4-6 meaning a hit, we could only cause two casualties. Coming back was 6D6 that caused 5 (I think). Our cavalry returned from whence it came.

Meanwhile, an elite British battalion charged a hesitant French column. The French player rolled a 12 and caused 3 casualties and morale test, which the British battalion promptly failed. At least both brigades passed their faltering check (as I did too when I lost my battery).

At this point, the game was called with a marginal French victory because they had the crossroads. A fair enough result because, short of a drastic change in luck, the French were grinding the Allies down anyway.

I really like these rules. They move deceptively quickly (in that while movement rates aren't that high, there's definitely the ability to close rapidly and get stuck in), there's a lot of command choice, and losing even a single unit can really hurt. I have the similar Pickett's Charge but I haven't fully read them yet. I can't wait to try them out, once I have figures for them.

Tuesday, January 1, 2019

An apology and New Year's resolutions

I can't believe that it has been 18 months since my last post. It's for this long long pause in posting that I am apologizing for. I've been meaning to post for quite a while now but somehow I never got around to it. I'm sorry.

I guess I should explain some of the reasons for the absence. Shortly after my last post, I returned to Ontario to pack for our long journey to BC. We arrived and survived in a small 320 square foot apartment for the rest of 2016. Let me tell you that I am not cut our for tiny house living. It's also pretty devastating for my miniatures hobby because I had to leave them in storage.

We bought a house in Abbotsford and moved in over the month of December. My miniatures have a home in the nice finished basement and all my books that I kept are up on shelves where I can access them. However, it's an older home and we've ended up doing a lot of renovations. The renovations have chewed up quite a bit of time but they are coming to an end. I just have the stairwell left to patch and paint.

On to the resolutions; in 2019 I resolve to:

  • Post at least once a month in this blog. I won't count this one for January though.
  • Create terrain that I can use for my 2mm ACW figures. Maybe my next post could describe my plans for this.
  • Write a set of rules for an age of sail game. I have been mulling a few ideas in my mind and I think it's time to put pen to paper, as it were.
  • Paint more 6mm WW2 figures.