Many people ask me how I paint something so small. Well, there's a few tricks but it's not quite as hard to do as you would think. The other key thing is to paint the figures much brighter than you would larger figures so that they stand out better.
Materials
- Plasticard (styrene) or some other mounting material such as MDF or chipboard.
- Black primer (a matte primer is best but a satin finish is fine. I use cheap rattle can stuff).
- 1 small paint brush with a really good tip.
- 1 small paint brush that no longer has a good tip for drybrushing.
- 2 really good lamps so that you can see what you are doing without shadows.
- Paints (model and craft).
- Flock or other ground cover material.
- Steady hands or a good desk to lean on.
Recipe
- Mount the figures on some plasticard (styrene).
- Start by spraying the miniatures with the black primer. This provides a good background and seal for your painting.
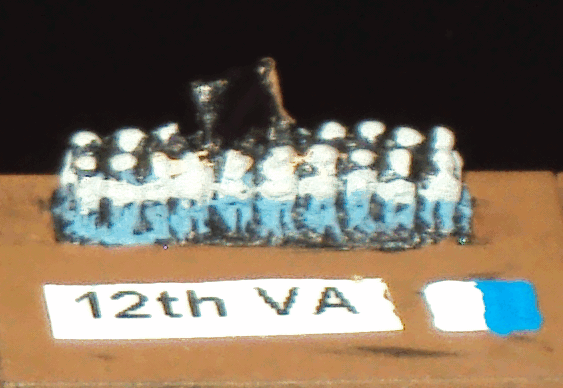
- Paint the plasticard brown with some craft brown paint. I use craft paint for this because it is cheap. I use the model paints for the rest because they contain a lot more pigment and have better coverage. On my plasicard, I've added a name and a colour code to indicate which brigade and division it belongs to.
- Using the tatty brush, dry brush the legs. If you don't know what dry brushing is, it's where you dip the brush in the paint and then wipe off most of the paint on a paper towel before you paint the figure. You don't have to be all that neat here. The only real key is to have the paint hit the legs and leave the non-leg area black.

- Using the tatty brush if it's not too tatty or the fine brush, paint the torso of the figures.

- Using the fine brush, paint the guns held by the figures. If the torso is a darkish colour, choose a lighter brown for contrast. If the torso is a lighter colour, go darker. This step is where you need more finesse and fine motor skills. I find I can get about 4 guns done per dip when the paint is fresh on the palette and less as the paint gets thicker. You'll need to clean off your brush between dips and get rid of moisture. The key is to paint thick and don't let the paint flow off the guns and onto the uniforms.
- I like to add hands to the guns to provide that pop of detail but it's really only worthwhile if the gun colour is on the darker side. Choose a bright and light flesh colour. I use the fine brush or sometimes I'll use planter's wire. Just dip a small dot where each hand would be. If you have too big a dot, go back with the brown colour and paint the dot smaller.

- Paint the face on the front and top of the heads. Not too much precision here as long as you don't get the flesh colour on the uniforms or down between the figures.

- Paint the top and backs of the heads with the hat colour.
- Paint the flag. I had to paint the flag white first because my red and blue paints are a little light in the pigment department, and on black, they go too dark. The white makes the other colours pop. I painted the red triangles first to leave the white cross. Then, counter-intuitively, I painted the blue as dots. I put enough dots that they sort of blend together with some white showing through to represent the white stars on the flag.


No comments:
Post a Comment