Friday, September 30, 2016

Musket and Tomahawks at Mike's

Last weekend, Mike hosted a French vs British set in the French and Indian Wars. The British were tasked with protecting the settlers and the French were supposed to burn all the buildings. As this was a play test for a convention, these divergent goals played a huge role in the outcome.

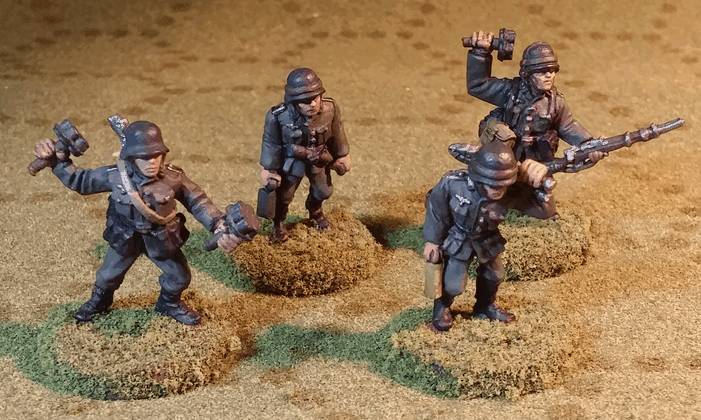
I took the British regulars and the friendly Iroquois while Larry controlled the light troops, the militia and the settlers. I hid the Iroquois in the corn fields as a surprise for the French.


Things started up badly for the French when my regulars took a long range shot at some French lights who were deployed in the open. A kill and a retreat put them out of being a threat for a while.

Luck turned the French way as the French Hurons blundered into my Indians. But the French got another Indian activation card and managed to get into an advantageous battle. Both side's Indian massacred each other. The difference was that all of mine disappeared in the subsequent recoil while the French managed to keep a few from each Indian formation. This eventually was the turning point.

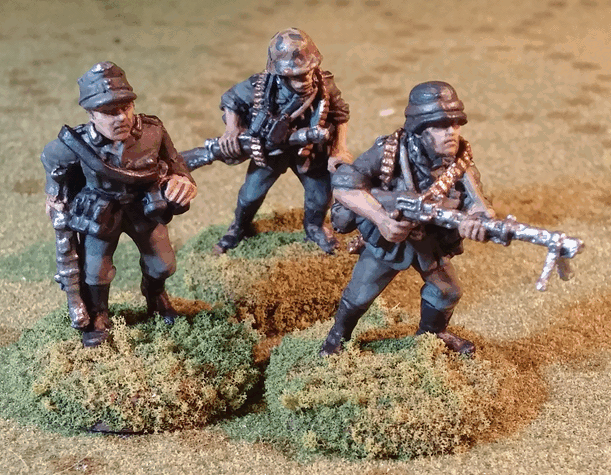
Meanwhile, Larry was having problems dealing with the French militia and regulars. Eventually, numbers counted and the British lights had to give ground, which lead to the burning of one cabin and inevitable burning of the other. On my side, after the clash of Indians, the way was open for the French irregulars to burn the largest building, which they did. The remaining Hurons slipped over to the other building and set it on fire too, despite the intervention of a second British regular unit.

But remember those civilians? We had provided them with enough time to run away into the woods, and as far as we were concerned, we had fulfilled our victory conditions. So the game was basically a tie with both sides having achieved what they set out to do.

So onto my thoughts on the rules. I'm not all that impressed with them. They have the typical problem of all card driven games in which everyone else waits for the guy who has had his units activated to do something. This isn't necessarily a killer but it has the potential to really bog down a game.

The firing seems a bit clunky to me. First you determine your base to hit. Then you modify it for terrain and range. This is pretty standard but the chart wasn't great at showing it. After you hit, you then roll for effect. It's basically modelling power or lethality. The problem is that basically all of the weapons in use were a 3+ to kill and the only units that weren't using a 3+ were some of my Indians and they never got off a shot. This essentially turned the second roll into a "restore 1/3 of your troops" event.

The melee makes the firing seem smooth by comparison, It is a huge time-suck as you resolve each set of figures one on one. So instead of taking 6 dice for 6 figures and rolling them as a group, you have to do it individually. Then your opponent rolls for his defense. Then you do it all over again as your opponent strikes back. And you keep doing this attack and defense until there's no more figures in direct contact. After all of that, you finally roll for morale to see what happens to each unit in the melee. If your units recoil or flee, you have to check each figure to see if they run away completely. This is what did my Indians in.

The morale is very volatile with a roll of a 1 or 2 on a fresh unit recoiling back or a 6 saving the sole figure in a unit from running to the hills. It's OK in effect but something to remember.

Would I play it again? Yes, but it won't be my first choice. I think there should be better games out there.


Recovery!

Well, after the surgery, we had to keep Surie to limited activity to let the incision heal. That took the full three weeks. I took her to the vet to have the staples and sutures removed.

To celebrate both her recovery and to participate in the Terry Fox run, I decided to have her nails done. I may have overestimated her recovery though. She was so tired from the walk to the start location and all of the excitement of so many people that she only lasted about 1K. I had to carry her the rest of the way.

Here she is when her nails were fresh and shiny:

Wednesday, August 24, 2016

Cancer Sucks Part 2

Last year, my wife dealt with breast cancer. She had a lumpectomy and radiation. So far, there's been no sign of re-occurrence, for which we are extremely happy. Even my dad's treatment for bladder cancer seems to have gone well. You can never be sure but for these things, no news is good news.

However, we have learned that our dog, Surie, has a mass cell tumor. We thought initially that it was just a wart on the back of her leg. But Sylvie noticed that it had gotten a bit bigger so off to the vet we went. Dr Peter was pretty certain that it was benign and nothing to worry about. But he wanted to make sure and he took a biopsy. The thing is not benign but it is slow growing.

So Surie's going to have surgery. The tricky bit is that the vet needs to make sure he gets the entire tumor because this type has deep roots. If things go well, Surie will have just a bit of a dimple on the back of one of her legs.

Update: the surgery went well and there won't be much of a scar or dimple. It's going to be tough to keep her from bouncing around the house like she normally does.

Monday, August 22, 2016

New Skillz!

One of the first projects that we wanted to do in the house was to add a back splash to the kitchen. The existing quality paint was in good shape but we wanted something even more durable. With a bit of time on my hands, I dedicated two days to get the job done.


I've not tiled before but thanks to watching a number of DIY shows, I had a rough idea of the process. A couple of You Tube consultations filled in some gaps. The rest was going to be a combination of practice and trial and error.

We had originally thought of using sheets of small silver, grey, and black tiles but sticker shock had us looking for alternatives. Fortunately, someone at Patti Lynn Interiors suggested a subway tile base with an accent stripe of fancy tiles. This was much friendlier on the wallet.

Actually, I want to thank all of the folks at Patti Lynn. They were very helpful in answering my questions, providing us with design solutions, and with kitting me out with the proper equipment. The right tools made the job smooth and (relatively) quick. 

The first day was a long one as I had to cut and tile the entire back splash (about 16 feet long or so). A profession would have done this in a few hours but I was taking my time and making sure I did things properly. I was racing the clock to finish my self-imposed curfew of  10 pm. The second day was grouting and cleaning up. 


I'm very pleased with the result

Tuesday, August 2, 2016

Napoleonic at Mike's

Continuing with my catching up on gaming activities...

Mike hosted a Napoleonic game with me running a Austro-Russian force against Stephen running the French. I generally went with the initial setup that Mike had made with the main exception being beefing up the center right by going 3 deep with my regiments. Stephen counter by stuffing the town with troops and moving all of his light troops to his left.

I got off to a really good start with some effective bombardment on the left. This prepared my cavalry for a successful charge. In the center, my plan was to sit tight and not take casualties while pushing hard for church. I felt that Stephen had left this area a bit open and there looked to be a gap between the town and the light troops to the far right. Here is result of these opening moves. On the far left, my first wave of cavalry had succeeded in chasing off the French cavalry and effectively pinning the French infantry by causing them to start turning to face the Austrian cavalry. On the right of the following photo, I was pushing hard on the church and overwhelming the defenders with weight of numbers. Not in the photo are Stephen's light troops, which were marching (leisurely as it turned out because Stephen forgot or did not hear that troops could double their speed if they were more than 18" from the enemy). I turned my militia to face them (more as a speed bump than actual effectiveness).


I continued with some clutch rolling on the left and continued to roll up the French with a devastating combined arms offensive of artillery, cavalry, and infantry. Stephen emptied the town to counter my church offensive and I was losing momentum. But I had succeeded in drawing out all of his reserves and putting some wear onto them. Meanwhile, my Russian grenadiers were coming up to deliver the final blow. On my right though, things were crumbling as the French lights swung into action and started to chew up my right flank.

At this point, we called the game with Mike awarding the Austro-Russians with a minor victory.

My thanks to Mike for hosting and to Stephen for providing a hard fought challenge.

Sunday, July 24, 2016

Hot Lead 2016 (long delayed)

Life has been eventful for me since Hot Lead. Now that things are settling down for me, I have finally gotten around to posting some pictures.

The first game was a recreation of one of Frederick the Great's victories. The layout was beautiful and there were lots of figures on the table. I ended up with the Prussian right flank. Generally, I don't like a game set up in which the player's first action is largely predetermined. I had a brigade of cavalry and nowhere to take them but to charge straight into battle against superior numbers and while being surrounded. With some timely luck, I managed to win some encounters before being forced back across the river.

My infantry battle was the exact opposite. Despite working with an advantage in numbers, I could not roll well enough to seriously hurt the opposing Austrians.

The rules were essentially Fire and Fury but modified for 18th century warfare. I found them to be a bit slow in a convention setting.


After that, it was on to Dux.

This was a lot of fun with the Saxons on both flanks eventually taking out their opposing Britons while having the center completely collapse.


The third session was me running Big Chain of Command. I learned a few things from running it:
  • Despite encouraging people to move their figures, players tend to be conservative and stay in cover. 
  • In a convention setting, play across the table rather than along it even if the probe scenario is fun. The Russian players did eventually make a go of it and nearly won but then they were spent as a force.
  • While the patrol phase is the coolest part of the game. it might be best to skip it and just set up the deployment points for the players.


Tuesday, March 15, 2016

Present!

My lovely and wonderful wife bought me this for my birthday present. I'm looking forward to some nice weather so that I can use it.


T'is a beautiful piece of equipment.

Friday, February 26, 2016

Comparison between MMG teams

So now I have a German MMG team from Warlord and one from BTD. Let's compare them.

The Warlord one is on the left and the BTD on the right. The most immediate difference between the two is the tripod mount. The BTD one is thick and heavy. This gives it some welcome sturdiness. It also makes it way over-scaled. The other problem is that the stand looks very two dimensional.


The Warlord stand is far more accurate in scale. It also spreads out in three dimensions. But it wasn't easy to get there. The legs come flat and there were no instructions. Fortunately, I found a picture of the entire stand. So it was a matter of delicately twisting and bending the legs until they were the right shape and fit with the gunner. Of course, this meant that a stand was an absolute necessity.


The figures themselves are similar in size and chunkiness. The Warlords are a little more impressionistic while the BTD are firmer in detail. The difference shows up more when you are actually painting them. You have to use your imagination more for the Warlord ones while the highly raise details on the BTD make them easier pop them.


Overall, I generally prefer BTD figures but the Warlord ones blend in pretty easily and nicely supplement the gaps I had in my troops.

Tuesday, February 23, 2016

Support Options for the Germans (Part 3)

The Germans get some long range AT support:


These figures are actually Warlord 75mm gun and crew.


I find the Warlord and BTD figures to blend rather nicely. The BTD figures have more raised detail and slightly better sculpting (IMHO) that make them easier to paint but when painted, it is hard to tell them apart. I think the figure in the background with binoculars is BTD but I'm not sure.

Here's the front view:

Monday, February 22, 2016

Support Options for the Germans (Part 2)

Here's some additional support options. I have two Panzershrek teams (previously photo'd but this picture is much better.

Here's three pictures of the sniper figure:


Friday, February 19, 2016

Support Options for the Germans (Part 1)

Yesterday, I posted the main platoon but that is only half of the figures that I have painted. Here are some of the support options that I have done.

First up, some engineers with some engineery equipment.


The backside show off their labels

 Next, a couple of LMG teams that I can use to convert from regular infantry to panzergrenadiers


Down range shot
 Lastly, an MMG, a mortar, and a flamethrower. I'll use some spare figures to flesh them out into full teams


From the reverse


Thursday, February 18, 2016

Germans from BTD

They are finally ready (minus the Dullcote that I want to put on when the weather is a bit more hospitable because it doesn't dry very well at -8 C) for Hot Lead.

I bought these from Stephen after he picked them up from a Black Tree Design sale. They are easy to clean with very little flash. I had only one figure who was slightly mis-molded but other than a slightly off face, you would not know. I really appreciate the detail that the sculptor included because it made the figures easy to paint. I'd easily recommend BTD.

Anyway, on to the figures:


I've marked the leaders and given the platoons a coloured dot to make separating them easier for Hot Lead.


Let's get a bit closer


Everyone's favourite German LMG pose


From the back


And the whole company (minus the Lt)


One last shot


Tuesday, February 9, 2016

Hot Lead 2016 progress

I have finished painting the BTD Germans but I still have to dip and highlight them and then flock their bases. I hope to do this during this week so that I can start labeling them and constructing terrain over the weekend.

Pictures when they have been flocked.

Tuesday, January 19, 2016

Hot Lead 2016

I've put my name forward to GM a game of Big Chain of Command. I have the horde of Russians ready to go (130 or so). Now I have to work on the German opponents. I have 55 done already but I have another 60 or so to go.

I have 8 weeks to prepare and it starts with a list of things to do:

  • Complete the German infantry and support weapons
  • Create more wood fences
  • Shrubbery and hedges
  • Maybe a creek or stream
  • Design the scenario and terrain map
  • List the forces
  • Label the leaders 
  • Use stickers to indicate different sections
  • Create player packages
  • Create Russian patrol markers
  • Create more trees and repair the existing ones
I have made quite a bit of progress on the BTD Germans. I have the first coat complete. I'm now at the stage of fixing the overruns. Once that is done, I can apply the wash and then do some highlighting. Flocking is the final step. I think I need to complete this by the first weekend of February. 

Then I can use the rest of February to do terrain and the first two weeks of March to design the game.

Goals are good to have.

Tuesday, January 5, 2016

Book Review: Encyclopaedia of German Armoured Vehicles


https://books.google.ca/books/about/Encyclopedia_of_German_Tanks_of_World_Wa.html?id=JSStQgAACAAJ

If you are building a WW2 German army that has any tanks in it, this is the book to get (but beware the prices!). Every major vehicle has an entry with multiple photographs (1000+ black and white). Each model (ausf) describes what changed and there's often a photograph that shows the changes. The armament for each model is provided along with production information.

But there's not just the important tanks. You can truly geek out on the obscure stuff where only one or models saw service or some of the truly bizarre experimental stuff that barely got off the drawing board. There's pre-war stuff and some last month of the war desperation stuff and the story in between stuff where the Germans extended the usefulness of a chassis for far longer than they thought originally.

The book also covers halftracks, armoured cars, and important captured tanks. There's armoured vehicles used to control rocket launches and vehicles that worked on land and on water. There's even a vehicle that was both an armoured car and a tank.

If you see a copy in a used book store for a reasonable price, grab it. I have immense gratitude to Alain for giving me his copy when he was downsizing his library.