Having bashed out some simple fences and minefield markers, it's on to a slightly more complex build: barbed wire fences. For these, I built my simple fences but left the wire untied on the ends. I then wrapped my 30 guage florist's wire around a pencil. When I slid the wire off the fence, I have the coils for the barbed wire. I cut the coil in half so I have some on either side of the middle post. I then threaded the fence wire through the coil and tied it off. That's more or less it.
It's a bit fiddly and not as imposing as the real thing, but if you double them up, you get a pretty substantial barrier.
Florist's wire is pretty much perfect for the job. It's easy to bend but substantial enough that it will stay in shape you bend it into.
Showing posts with label How To. Show all posts
Friday, February 6, 2015
Friday, January 30, 2015
How to fence
Here's my basic steps for creating fences for 28mm figures:
Materials:
Materials:
- 6" large tongue depressors
- Matchsticks
- White glue
- 30 gauge florist's wire or similar. The florist's wire is thin and flexible enough to bend easily but it's quite sturdy
- Brown craft paint and mid-grey paint
- Turf mix (mine started out as 2 parts fine to 1 part course but I think there's far more fine now)
- Optional: scalpel or chisel-blade for an exacto knife
- Start by drilling 3 holes into the tongue depressors. The holes should be slightly smaller than the matchstick.

- Dab a bit of glue on one end of the matchstick and stick it into the hole. If the hole is slightly smaller, you might have to rotate the matchstick a bit to knock the corners off to get it into the hole. The tighter the fit, the better. Repeat for the other two holes.
- When the glue is dry, use the scalpel or chisel blade to flatten the bottom if the matchstick pokes through a bit.
- Slap the brown paint over the entire construction.

- Take about an 8" length of wire and curl a little hook into it. Put that on one of the end posts and then wrap the wire so that you have complete loop.
- Keeping some tension on the wire, loop around the middle post and then loop around the other end post. Snip off the excess. Dab a little white glue on the loops to keep things in place. If you have bit sticking out from the snip, encase it with white glue.
- Add a second wire to the fence repeating steps 5 and 6.

- Cut the posts just above the upper wire. Paint the ends brown
- Take some grey paint and dry brush the grey on keeping some of the brown exposed in lower areas.
- Apply white glue to the brown tongue depressor.
- Apply your turf mix to the glue.

Sunday, October 26, 2014
Painting 2mm figures
Many people ask me how I paint something so small. Well, there's a few tricks but it's not quite as hard to do as you would think. The other key thing is to paint the figures much brighter than you would larger figures so that they stand out better.
Materials
- Plasticard (styrene) or some other mounting material such as MDF or chipboard.
- Black primer (a matte primer is best but a satin finish is fine. I use cheap rattle can stuff).
- 1 small paint brush with a really good tip.
- 1 small paint brush that no longer has a good tip for drybrushing.
- 2 really good lamps so that you can see what you are doing without shadows.
- Paints (model and craft).
- Flock or other ground cover material.
- Steady hands or a good desk to lean on.
Recipe
- Mount the figures on some plasticard (styrene).
- Start by spraying the miniatures with the black primer. This provides a good background and seal for your painting.
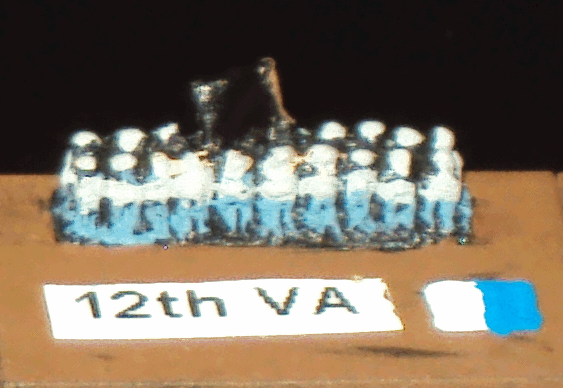
- Paint the plasticard brown with some craft brown paint. I use craft paint for this because it is cheap. I use the model paints for the rest because they contain a lot more pigment and have better coverage. On my plasicard, I've added a name and a colour code to indicate which brigade and division it belongs to.
- Using the tatty brush, dry brush the legs. If you don't know what dry brushing is, it's where you dip the brush in the paint and then wipe off most of the paint on a paper towel before you paint the figure. You don't have to be all that neat here. The only real key is to have the paint hit the legs and leave the non-leg area black.

- Using the tatty brush if it's not too tatty or the fine brush, paint the torso of the figures.
- Using the fine brush, paint the guns held by the figures. If the torso is a darkish colour, choose a lighter brown for contrast. If the torso is a lighter colour, go darker. This step is where you need more finesse and fine motor skills. I find I can get about 4 guns done per dip when the paint is fresh on the palette and less as the paint gets thicker. You'll need to clean off your brush between dips and get rid of moisture. The key is to paint thick and don't let the paint flow off the guns and onto the uniforms.
- I like to add hands to the guns to provide that pop of detail but it's really only worthwhile if the gun colour is on the darker side. Choose a bright and light flesh colour. I use the fine brush or sometimes I'll use planter's wire. Just dip a small dot where each hand would be. If you have too big a dot, go back with the brown colour and paint the dot smaller.
- Paint the face on the front and top of the heads. Not too much precision here as long as you don't get the flesh colour on the uniforms or down between the figures.
- Paint the top and backs of the heads with the hat colour.
- Paint the flag. I had to paint the flag white first because my red and blue paints are a little light in the pigment department, and on black, they go too dark. The white makes the other colours pop. I painted the red triangles first to leave the white cross. Then, counter-intuitively, I painted the blue as dots. I put enough dots that they sort of blend together with some white showing through to represent the white stars on the flag.


Friday, February 28, 2014
Bocage and Fields
I've done what many other wargamers have done. I've taken those green potscrubbers and turned them into bocage (in 6mm) or rough hedges (15mm). I start by giving them a rough cut and glue them onto some plasticard.
My variation is that I brushed them with glue and then dipped them in my flock mix. I shook my flock mix up before the dip so that a lot of the course flock came to the surface. That gives my bocage a more fluffy, less boxy look.
I made my fields by taking brown corduroy and semi-dry brushing it with cheap craft paint of various shades of brown.
Closer up with more of a miniature eye view:
My variation is that I brushed them with glue and then dipped them in my flock mix. I shook my flock mix up before the dip so that a lot of the course flock came to the surface. That gives my bocage a more fluffy, less boxy look.
I made my fields by taking brown corduroy and semi-dry brushing it with cheap craft paint of various shades of brown.
Closer up with more of a miniature eye view:
Saturday, February 15, 2014
Creating Chain of Command markers
You can find quite a few examples of creative patrol markers and jump off points. Rich at Too Fat Lardies has produced what look to be nice collections of object de guerre and others have similar creative 3D markers. Mine aren't like those markers.
They are, however, dead simple and quick to do.
- Print out the markers from the Lardies Yahoo group. I suppose I could have used photo paper or such, but I settled for standard paper.
- Stick them on to some plasticard that is cut to fit the entire marker. A while ago, we asked our security company for some new stickers. They included a sign in the package. I chucked the aluminum post in the recycle bin but I kept the sign, figuring that I could find a use for it.
- Paint around the marker using brown paint. I use some cheap craft paint for this. You don't have to be too precise as long as you don't go too much over the printed marker. The brown is for when the flock wears off and the underneath looks like dirt rather than white plastic.
- Paint white glue over the brown paint and then dip the marker into your flock mix. My mix is about 1/3 course and 2/3 fine.
- Shake off the excess flock and your are done.
Subscribe to:
Posts (Atom)